


A few days ago, I came across a report on LEDinside.com discussing the debut of Planar’s next-generation LED wall calculator introduced by Leyard Europe. It was a reminder of how much LED display planning tools have evolved in recent years.

Today, online LED wall calculators are no longer just simple size estimators. Many of them can now help users calculate screen dimensions, estimate resolution, determine suitable pixel pitch, preview cabinet layouts, and even optimize viewing distance for different installation environments.
As LED walls continue to expand across retail, virtual production, corporate, and event applications, these tools are becoming increasingly useful for AV professionals, system integrators, and display buyers during the early planning stage.
In this article, let’s dive deep into the topic together, and take a look at what LED wall calculators are, why they matter, and several online LED wall calculators worth trying for different LED display projects.
An LED wall calculator is a digital planning tool designed to help users estimate key specifications for an LED display project. Depending on the platform, these calculators or applications can assist with screen size planning, pixel pitch selection, resolution estimation, cabinet layout configuration, and viewing distance calculation.
In the past, many of these calculations were done manually using spreadsheets or rough estimates. Today, LED display manufacturers and AV brands increasingly provide web-based calculators, mobile apps, and integrated planning tools to simplify the setup process for rental stages, retail displays, corporate installations, virtual production studios, churches, and other LED wall applications.
While different platforms focus on different functions, the overall goal remains the same: helping users visualize and optimize an LED display setup before installation begins.
LED wall calculators generally fall into two main categories, each serving different roles in the LED display planning workflow. The first type is provided by industry platforms or sales-focused websites, such as LEDWallCentral or 4Wall, which typically aggregate information across multiple LED display brands and offer more general-purpose planning tools.
The second type comes directly from LED display manufacturers or solution providers, such as Leyard / Planar, ROE Visual, or Unilumin. These tools are of course focusing on their own brand and more product-specific, offering higher accuracy when configuring cabinet layouts, pixel pitch, and system design within a particular LED product line.
With this in mind, let’s take a closer look at some popular LED wall calculators, and explore what makes each of them useful in different project scenarios.
When it comes to the recommendation of online LED wall calculator, we shouldn’t skip the one on LEDWallCentral. It ranks the number one among google search results. Let’s explore deeper and see why.
The key strength must be the extensive database of LED screen products it covers. We can select from a wide variety of brands and cabinet configurations, making it easier to compare different specifications such as pixel pitch, screen size, and resolution across multiple manufacturers. This makes the tool particularly useful during the early planning and comparison stage of LED display projects, especially for rental companies, system integrators, and buyers who are still evaluating different product options.
It lists more than 80 LED brands in alphabetic orders, almost all the popular ones on the market, including top names like Samsung, LG, Absen, Daktronics, Leyard, Planar, and Unilumin, and other popular brands like Chauvet, Gloshine, SNA displays, and Lampro, etc.
Another advantage of the tool is that it auto calculates the volume of panels, resolution, weight, circuits, power consumption, and estimated cost of the project.
Now let’s explore the interface of the tool and see what we can edit on it.
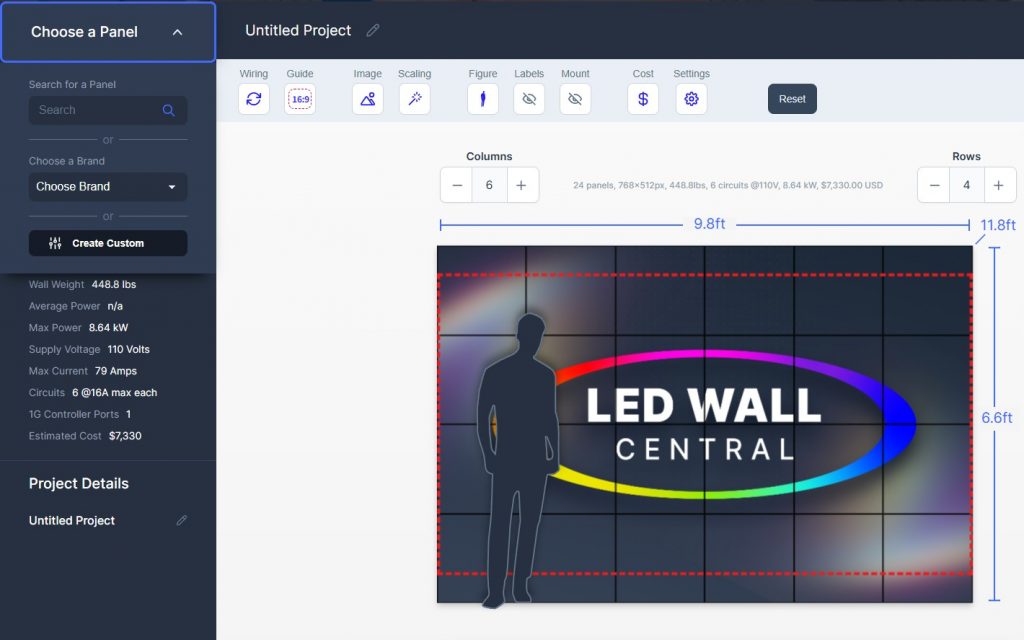
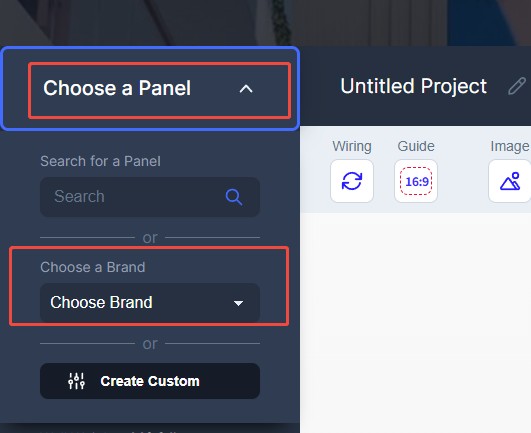
1. The interface offers 3 main sections that we can edit, the one on the left (in black column) to choose panels from their data base or input custom parameters for your project. The large white area is for editing the details of your project, and above it, you can input the name for your project.
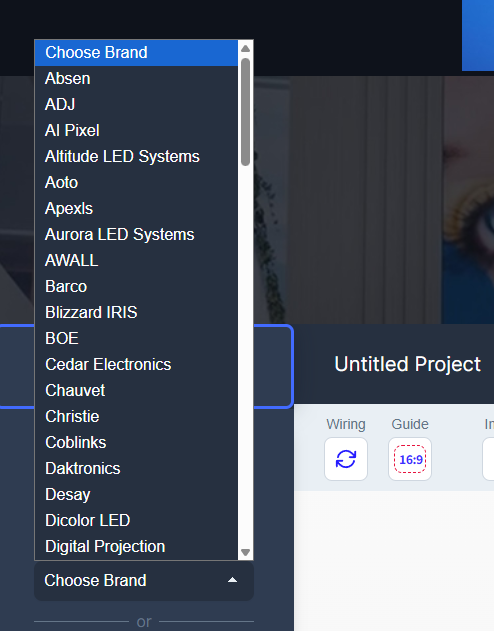
2. As we mentioned above, we can select almost any brand on the market. When we select one, it will automatically shift to a new page, specifically designed for the brand you selected. Here we input Absen as an example.
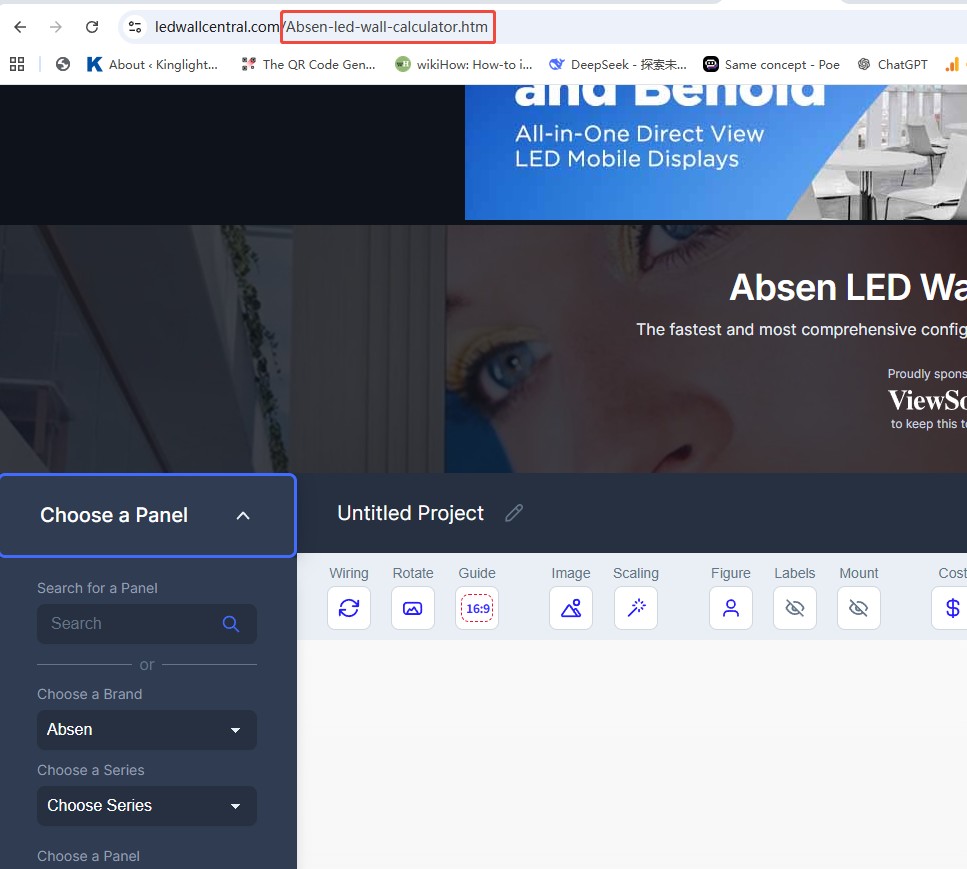
We can see from the above image that the page url changes.
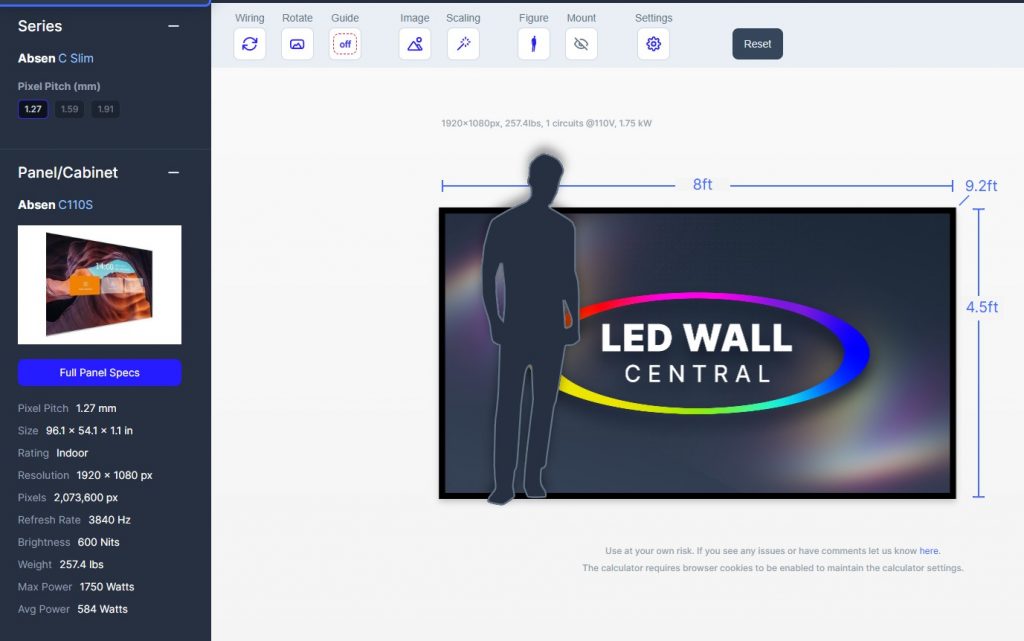
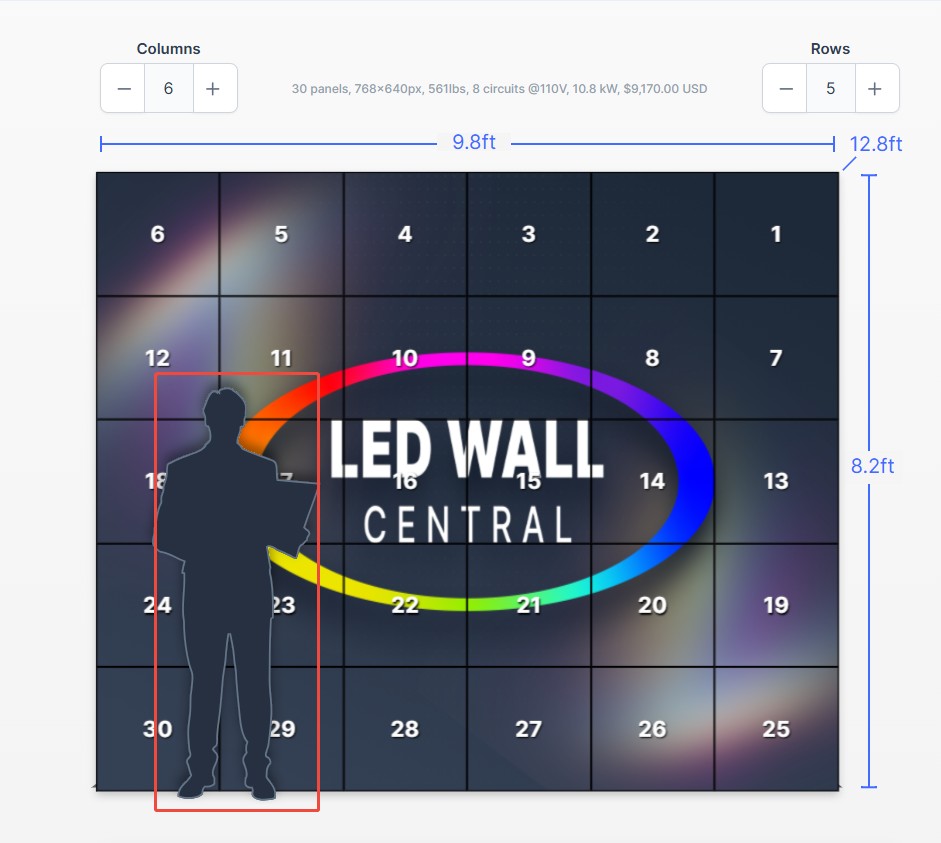
3. Then we can select a product series and a specific panel model. Here we choose Absen C Slim panel. And specifications of the panel will automatically appear on the left black column. Meanwhile, there will be a visual presentation of the project we’re going to edit on the right.
The amazing part of this section that attracts me is the vast database that LED Wall Central achieved here. This makes it not only a tool for LED project planning, but also an access to learn product specifications of all popular LED brands.
And select an appropriate pixel pitch for your project here under the series name. The page will also automatically shift to the specific product page according to the pixel pitch you selected.
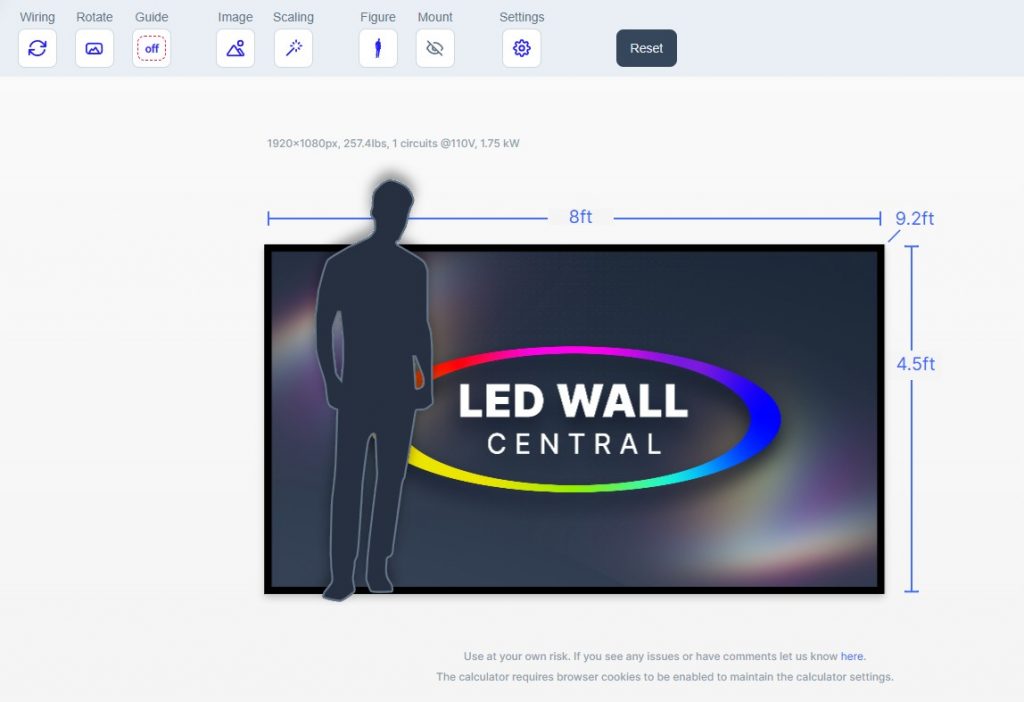
4. Now let’s go to the right part of the page – the project editor section. It provides 8 options, including Wiring, Rotate, Guide, Image, Scaling, Figure, Mount, and Settings, and meanwhile a “Reset” button for resetting all settings.
5. Wiring is in fact a button shifts the image from the front to the back, allowing us to see the wiring designs at the back of the screen, and of course, editing wiring designs here.

Here I tried different LED tiles and found the options for wiring designs differentiate. Some allows more options and others much less.
6. The button “Guide” accesses us to the edition of LED wall aspect ratio, among some regular dimensions like 32:9, 16:9, 4:3, 1:1, etc. These options also vary according to the selected LED tile. For example, some tiles may allow 21:9 aspect ratio while others don’t. In addition, the “off” option here enables us to edit screen aspect ratio freely. This happens when you need irregular designs.
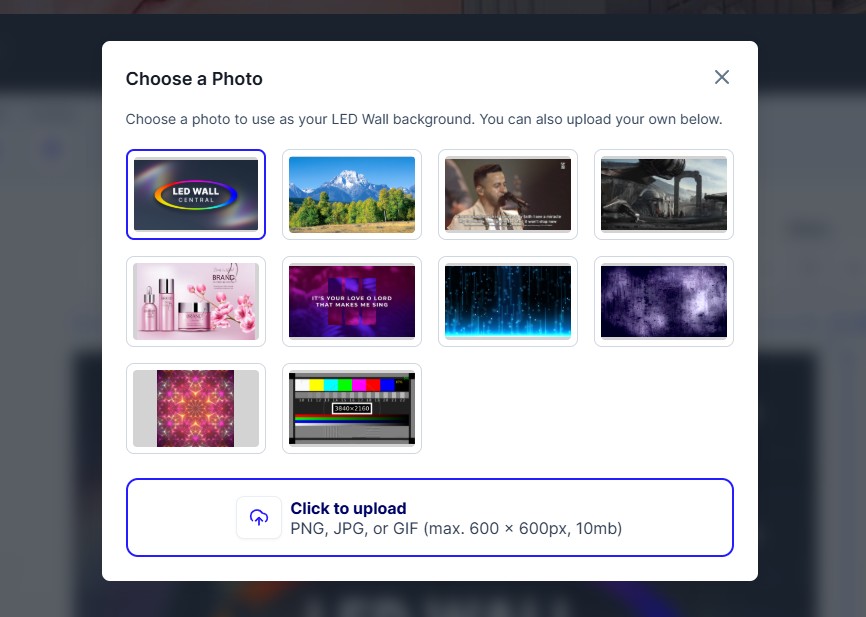
7. “Image” is designed for changing the background image. You can either use the provided images or upload one on your own.
8. “Scaling” allows to change the way that the background image fits the wall. We can shift among different modes, from “Fit to Wall” to “Stretch to Fit Wall” or “Scale to Fill Wall”. You can try the differences and see which one fits your project best.
9. The “Figure” button can opt between different figures which appear on the plan. Guess this function helps us to know how the screen will be blocked when there are actors standing before it.
10. “Labels” let us decide if to label the tiles or not. If so, you can either label them in pure numbers or in “A1, A2, …B2, B3 …” format.
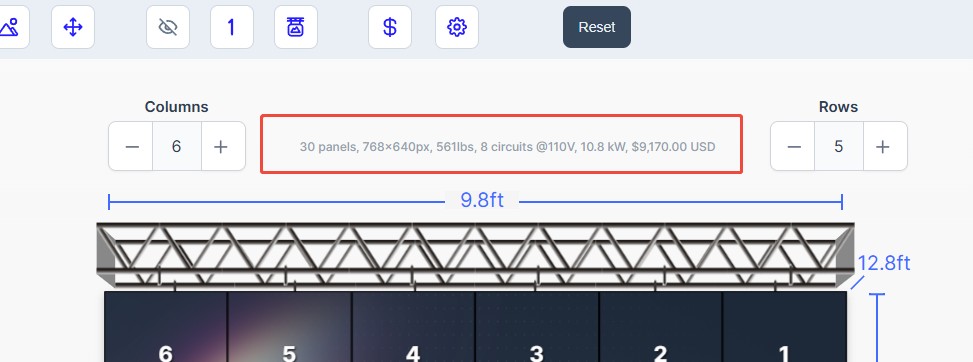
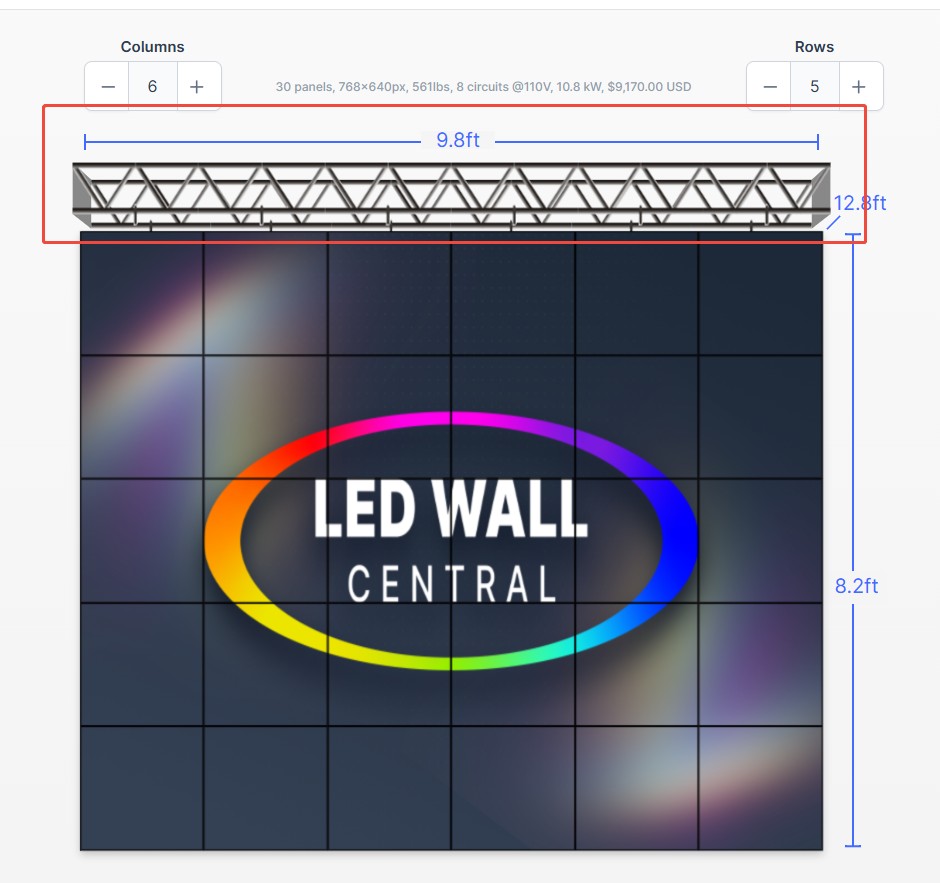
11. The button “Mount” allows us to shift between mount options, including No Mounting, Truss Hang, Legs, Wall Mount, and Ground Stack.
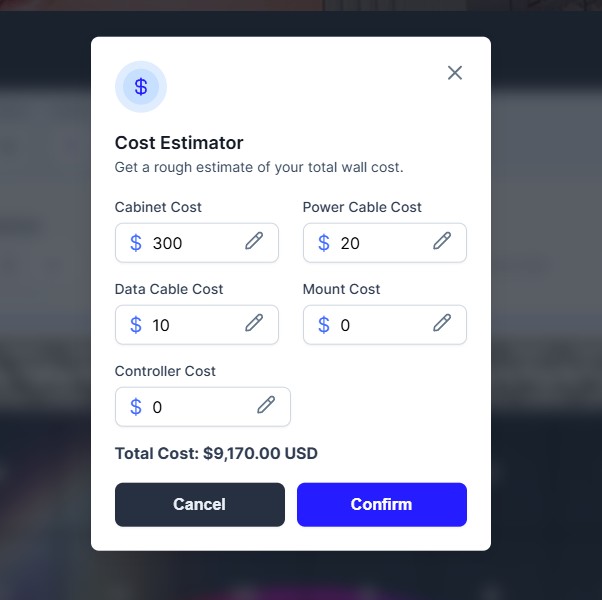
12. “Cost” is an editor where we can input cost details.
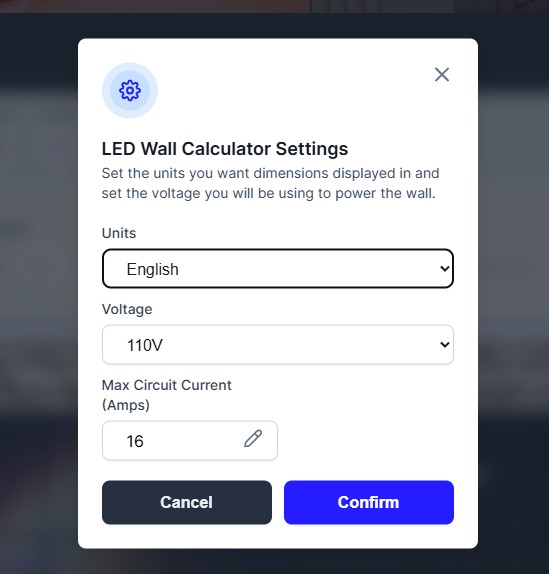
13. Settings is an interface that pops up to input unit, voltage and amps requirement.
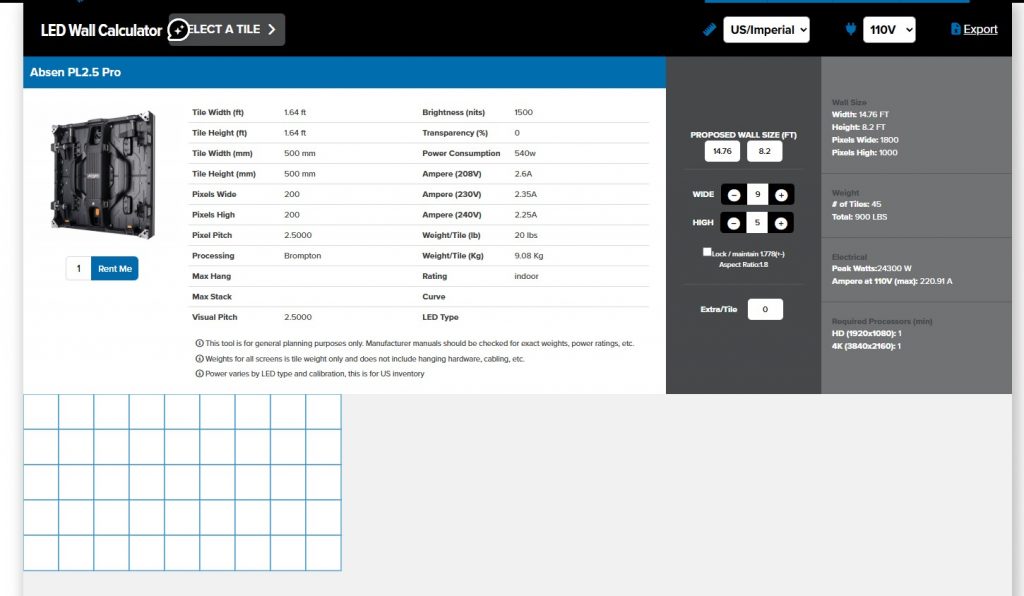
4Wall LED wall calculator also ranks well in Google results. It has a simple interface but limited options of LED tiles. And most of them are Absen’s.
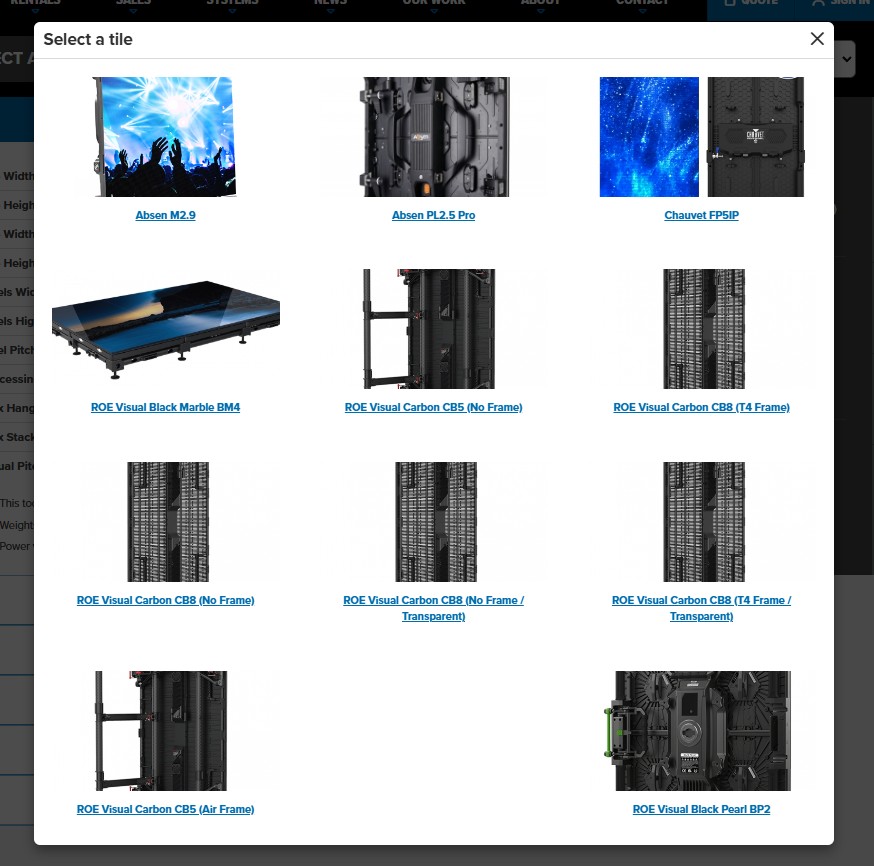
If you’re going to use LED tiles among these options (see above image), this tool is convenient.
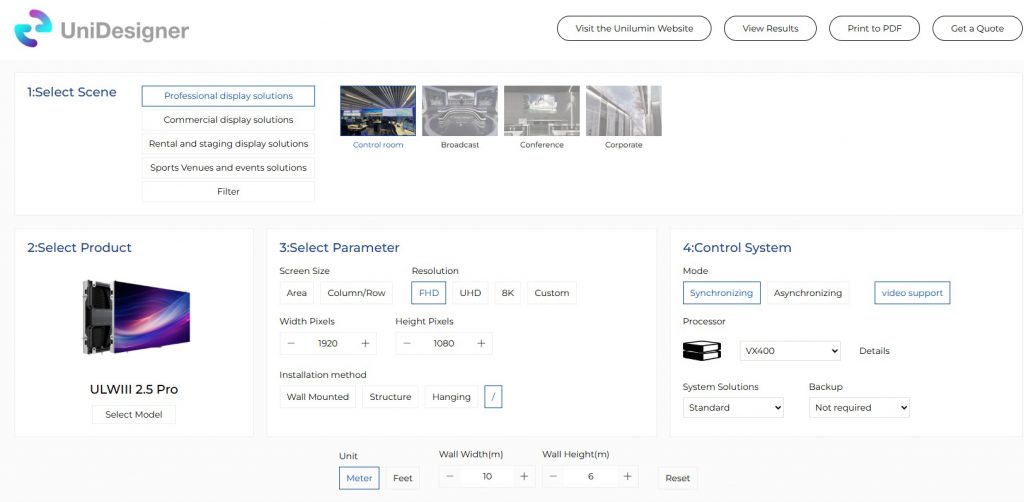
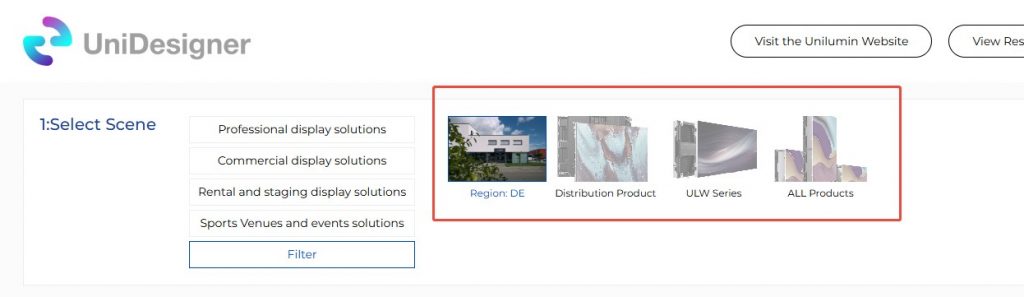
Unilumin names its LED wall calculator as “UniDesigner”, reinforcing the tool’s connection to its broader product ecosystem and brand identity.
The key feature of UniDesigner is scene oriented. It categorizes LED application into 4 scenarios, professional, commercial, rental and staging, and sports venues and events solutions, each of them with more specific purposes.
When you select a specific application scenario, the calculator will automatically recommend suitable LED cabinet. And of course, you can manually select other suitable panel.
UniDesigner’s product selection offers options over model name, dimensions, pixel pitch, brightness, region, certification, and curve. So if you’re using only Unilumin panels in your project, don’t hesitate to use the tool.
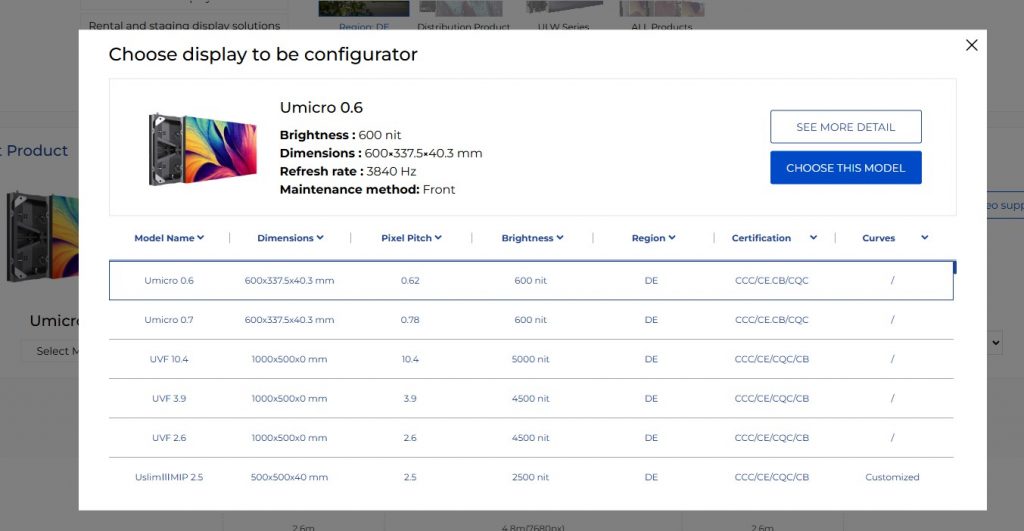
In addition, UniDesigner keeps a filter option for more flexible designs.
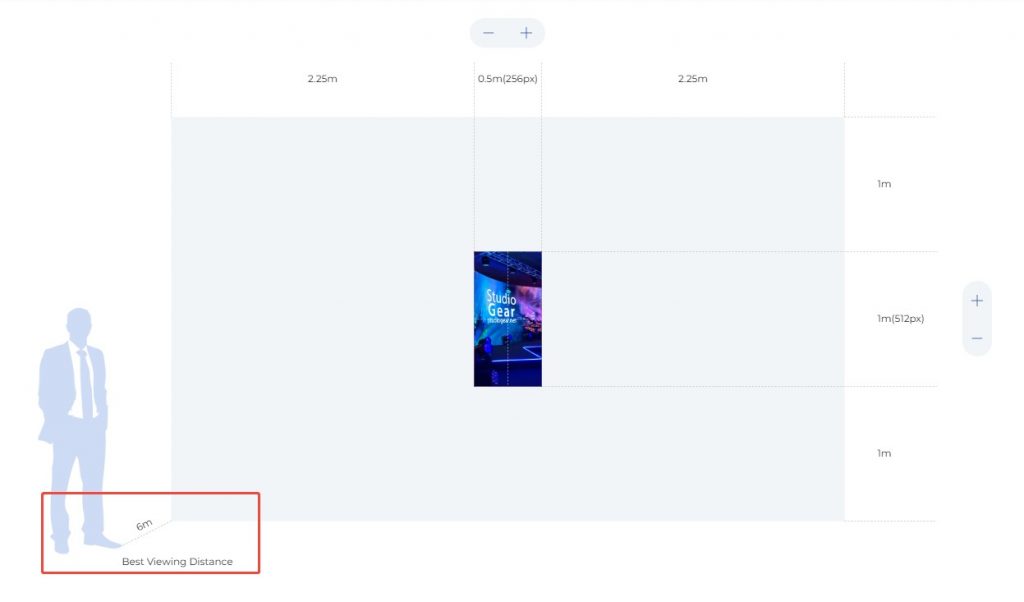
Another sweet thing is that UniDesigner also provides the best viewing distance at the bottom left corner of visual presentation section.
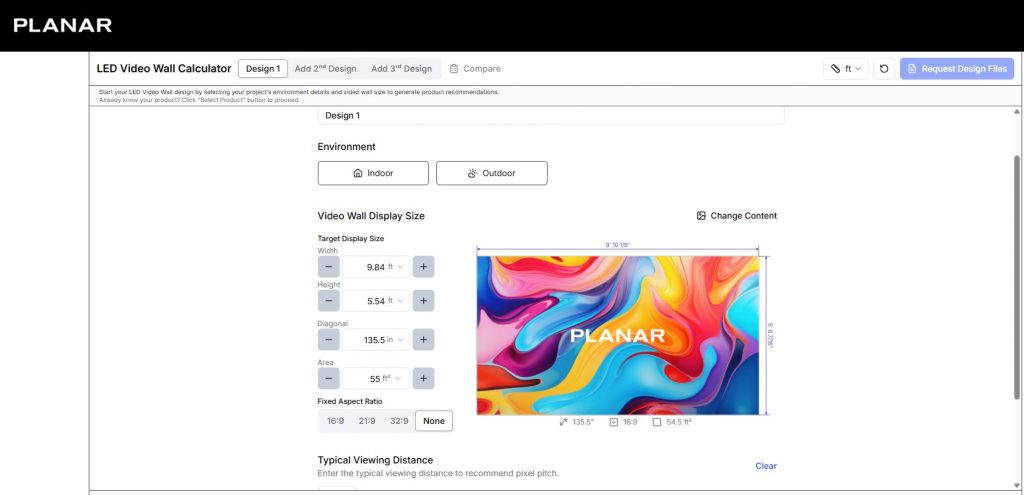
Unlike Unilumin, Planar categorizes its online LED video wall calculator into two main scenarios, indoor and outdoor. This makes the interface looks more simple and user friendly.
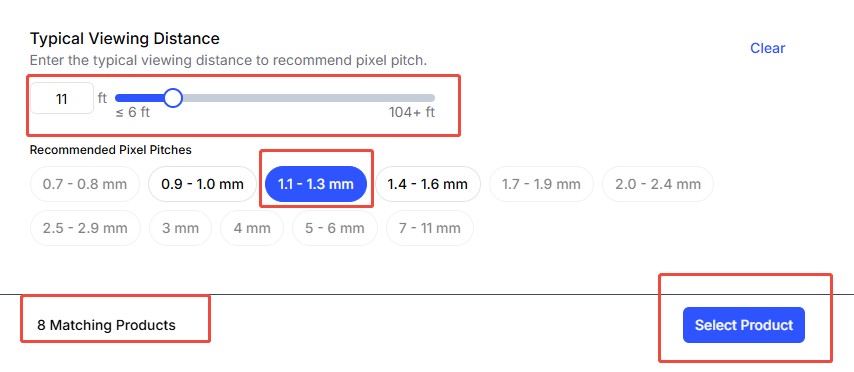
Meanwhile, one of the standout features of this tool is its strong focus on pixel pitch selection. Just below the panel selection section, a built-in slider visually illustrates the relationship between viewing distance and pixel pitch, making the planning process much easier to understand. For users who are not very familiar with pixel pitch selection, this feature can be especially helpful.

After the right pixel pitch being inputted, it will auto recommend appropriate panels, which you can select among.
ROE Calculator APP can be installed via Apple’s App Store or Google Play. Meanwhile, you can also visit its online version here.
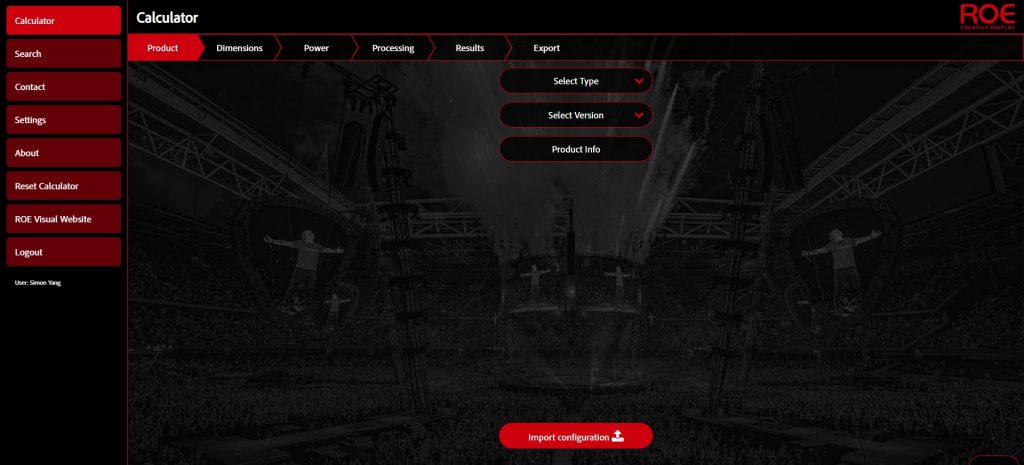
From the online version, we can see that ROE Calculator follows easy-to-go procedures, from selecting the panels to the final output.
Step 1, select a suitable LED panel for your project. After that, you can see detailed information about the panel. Or you can directly import configuration here.
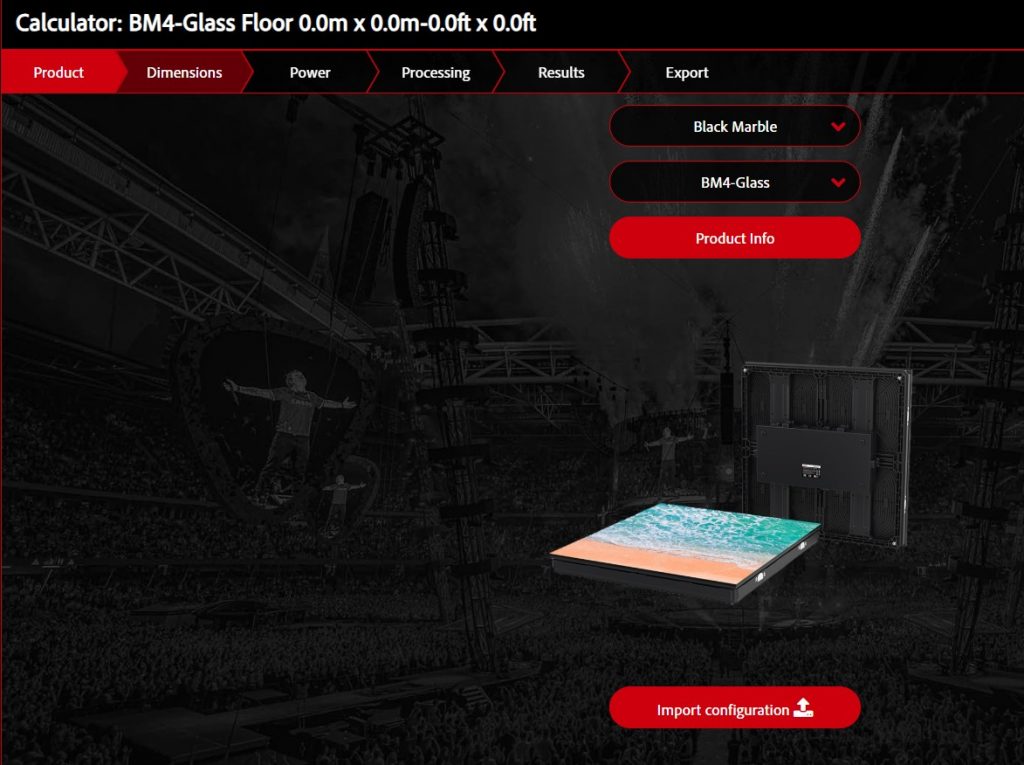
Step 2, input dimensions here. If you need a regular aspect ratio, then you can first lock aspect ratio. If not, just ignore it and input panels or dimensions.
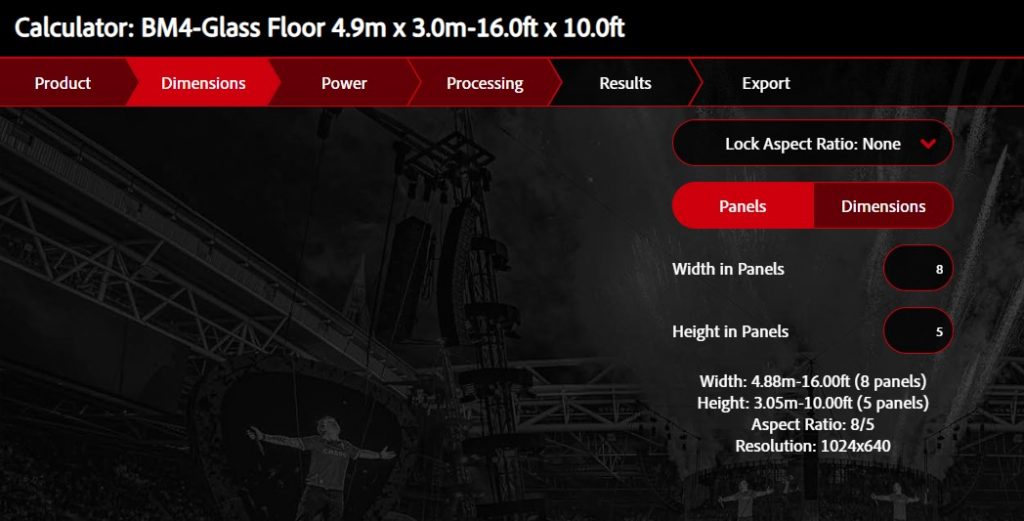
Here we can see an automatic amendment if you input dimensions that the selected panels can’t achieve.
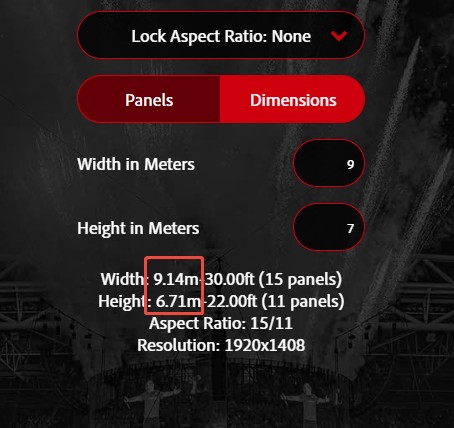
Taking the Black Marble BM4-Glass version as an example, if we input dimensions like 9 meters in width and 7 meters in height, the calculator will auto revise to accessible dimensions as above image shows.
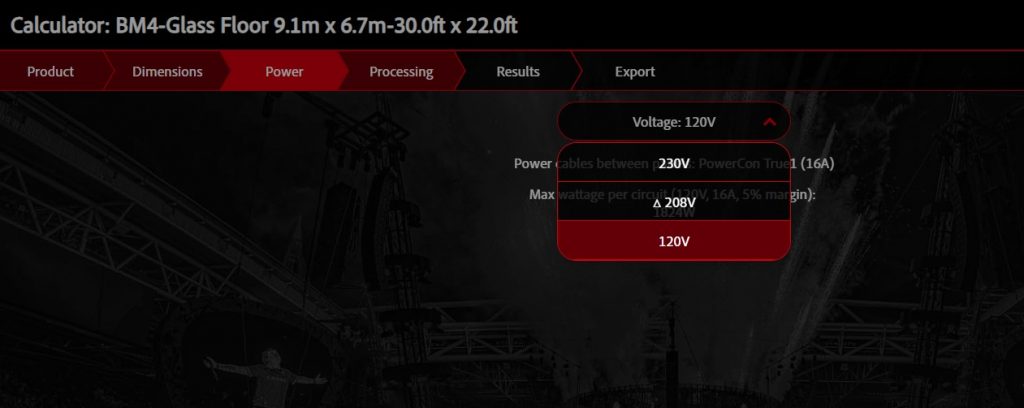
Step 3, select an appropriate power input voltage. It offers 3 options here, 120V, 208V and 230V.
Step 4, input processing requirement. You can select template, manufacturer, and processor here.
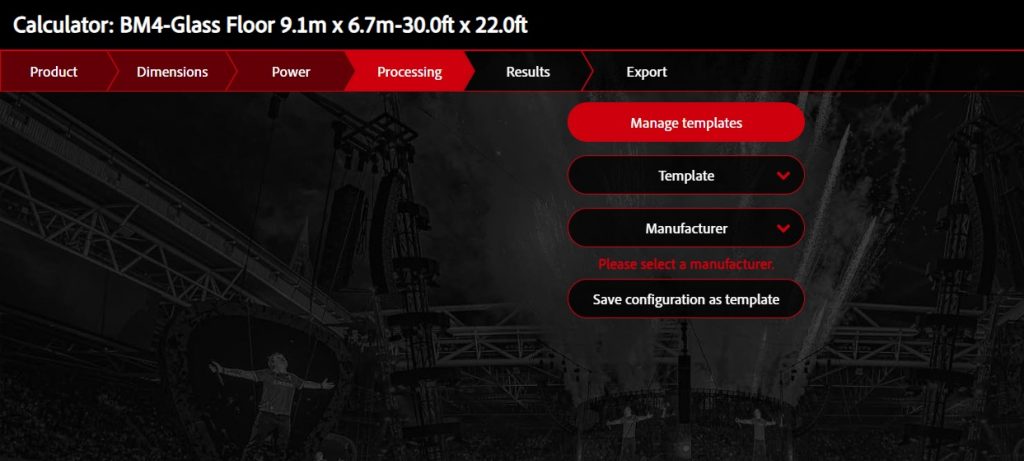
Processor selection appears only after you choose a manufacturer.
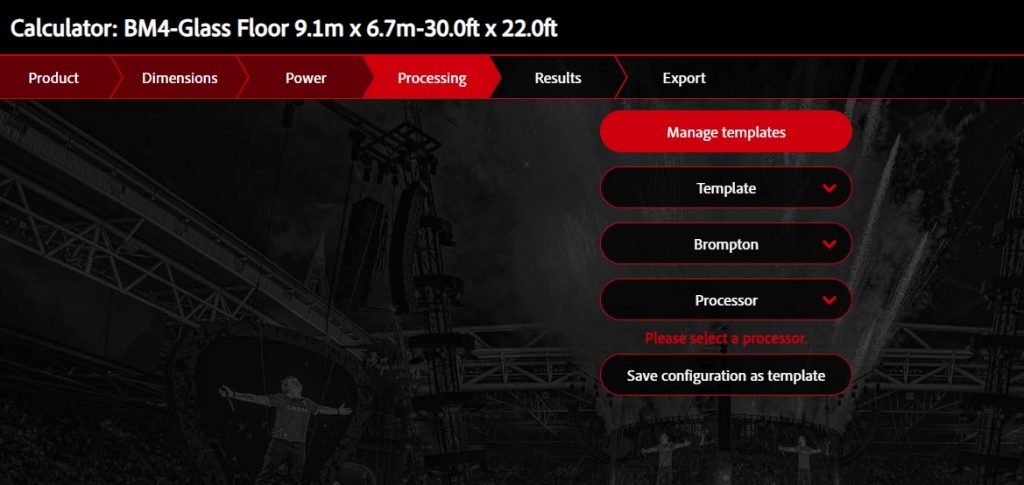
Meanwhile, you can also see more options in this section, such as cable redundancy and processor redundancy.
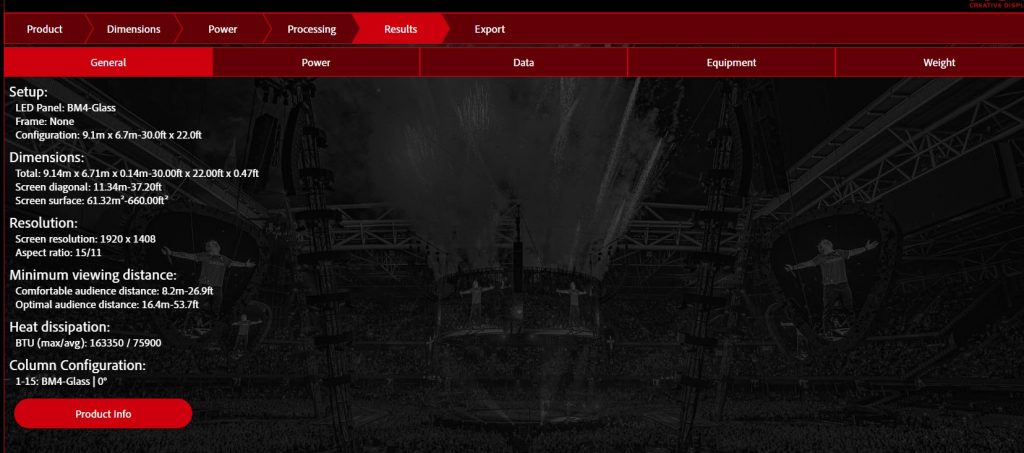
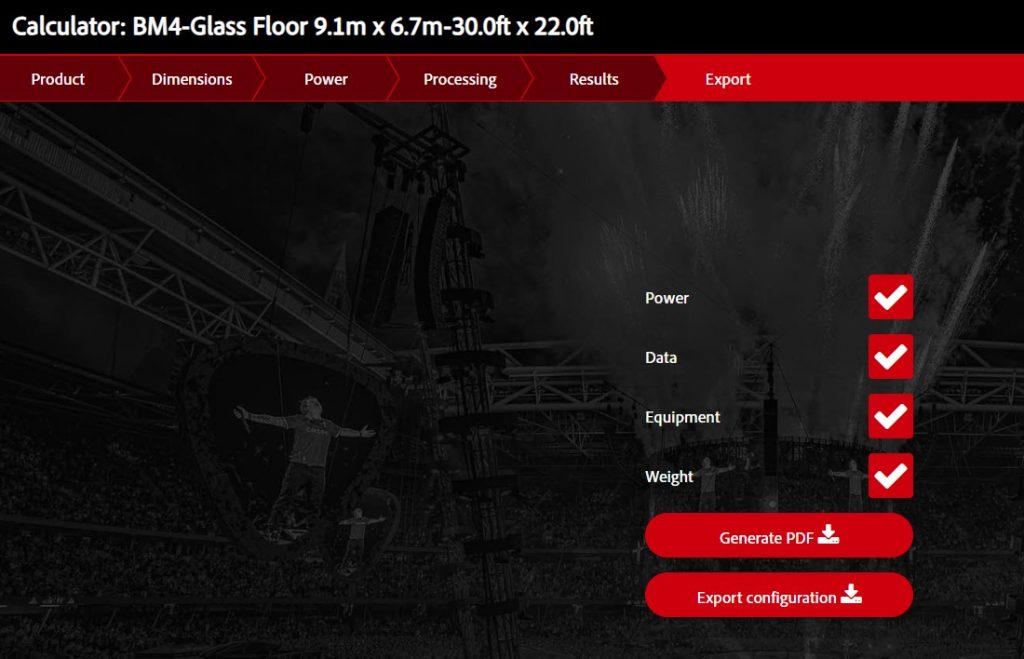
Step 5, check the results of your input. Here we can see 5 tabs, including General, Power, Data, Equipment, and Weight. Each tab gives detailed information.
Step 6, by exporting the results, we finally complete the planning of a new LED project. The pdf document includes all the details of your project. In addition, you can also export configuration here, which is a json format file.
ROE Calculator guides the planning of LED project in timeline like order, which is easy to follow and operate. If you’re considering ROE’s LED panels, it must be your first choice.
Beyond the above mentioned LED wall calculators, there are also other popular options online, such as the one on RentforEvent.com, Absen’s official calculator, etc.
In conclusion, LED wall calculator provides us an easy access to project planning. While original manufacturers’ calculators focus on their own brands and products, dealers often have vast options among different brands.
If you’re biased to certain brands or products, no hesitation to their official LED wall calculators. If not, just check on websites like LEDwallCentral or RentforEvent. They really help us know more brands and products while planning an LED project.